Part 1: Validate your IP Address on the 'My Account' panel
Part 2: Change your Mac OS X DNS settings
Before you start: Please write down your current DNS addresses before you change your DNS configurations. You should take note of these addresses in case that you need to get back to your original settings. If your original configuration were set to “Automatic”, just change your DNS settings back to “Automatic” in order to get back to your original settings.
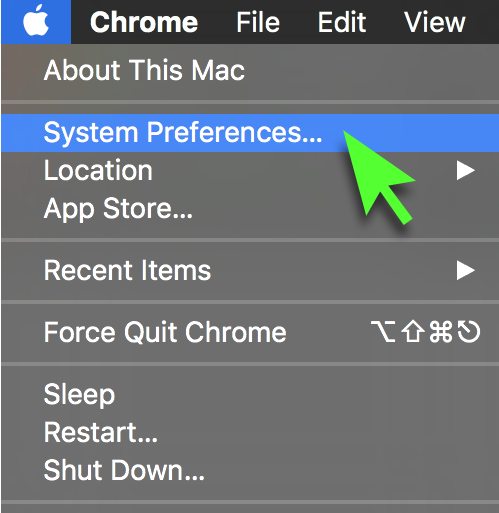
1. Access the 'System Preferences' menu

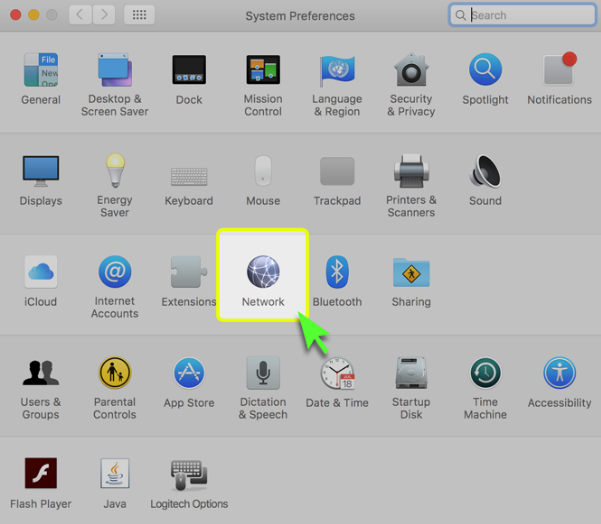
2. Click on 'Network'

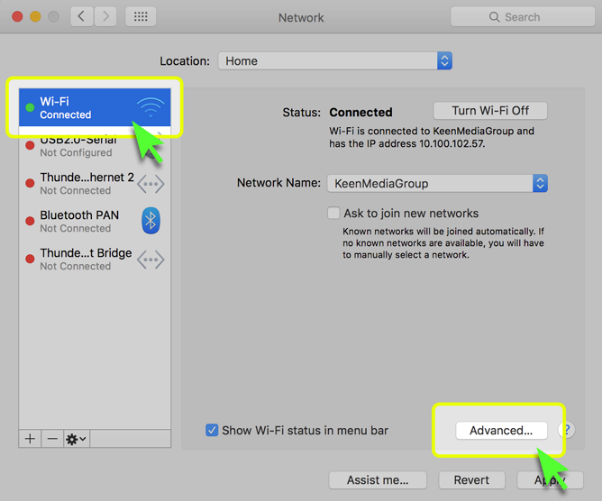
3. Choose the Connected network and choose Advanced

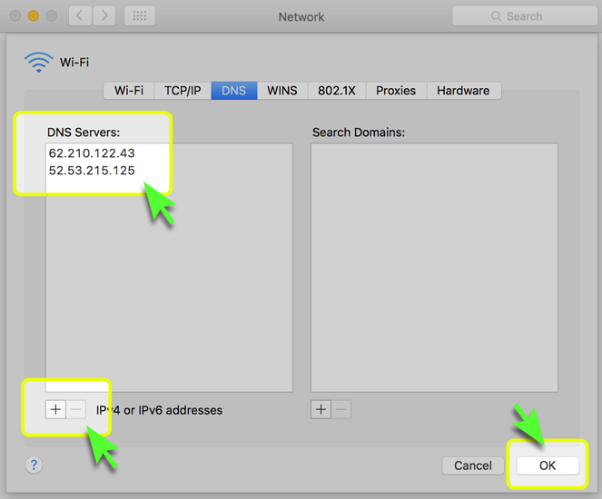
4. Click on the DNS tab and remove any entry from the 'DNS Servers' list by
clicking the '-' button.
Click the + button and enter the following DNS details:
Primary Server: 62.210.122.43
Secondary Server: 157.55.83.218
Press OK and close all the windows which were opened during the process.


