Part 1: Validate your IP Address on the 'My Account' panel
Part 2: Change your Chrome OS (or Chromium OS) DNS settings
Before you start: Please write down your current DNS addresses before you change your DNS configurations. You should take note of these addresses in case that you need to get back to your original settings. If your original configuration were set to “Automatic”, just change your DNS settings back to “Automatic” in order to get back to your original settings.
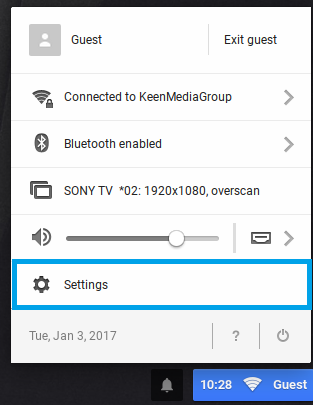
1. Log-in to your Chromebook, click the status bar which can be found at the bottom right of your desktop screen and choose “Settings”
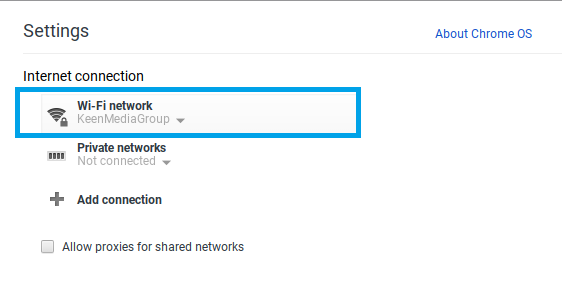
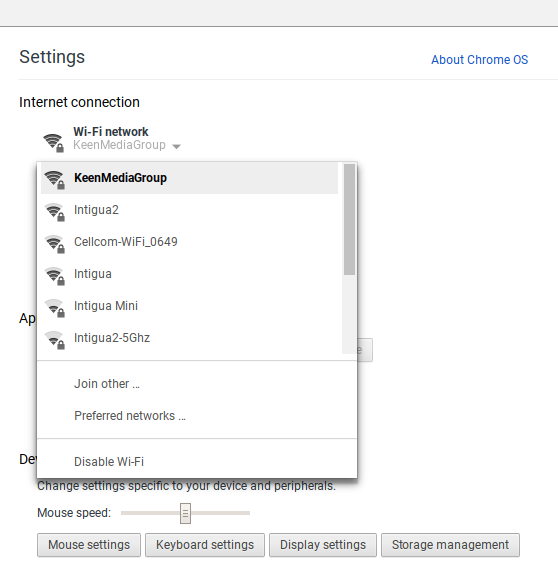
2. Under “Internet Connection”, Click on your Wi-Fi Network and in the list that shown, click your connection again.
3. Click the “Network” tab. You will see that "Automatic name servers" is already selected. Now Select "Custom name servers"
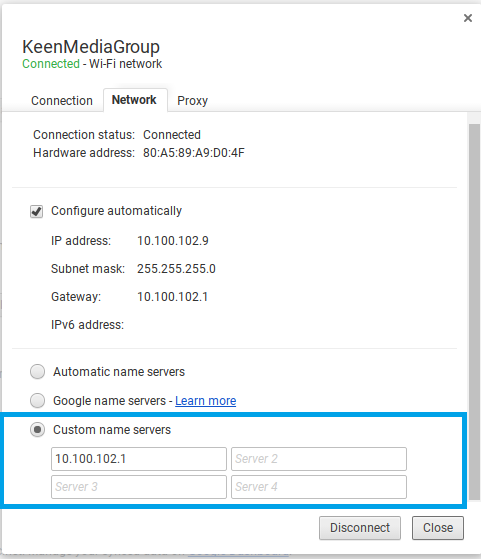
Enter the following DNS details:
Server 1: 62.210.122.43
Server 2: 157.55.83.218
Press 'Close' and exit all the windows which were opened during the process.